Room Status & Check-In Guide
This guide explains how to view the Room Status and how to check in to a task that is currently running in a room.
Check-ins are time-bound and only possible while a task instance is active.
Prerequisites
!!! Important - You must be logged in.
1 | |
Accessing Room Status
- Navigate to the Rooms page after login.
- Select a room to open its calendar view.
- Click the Status button in the top-right corner of the room page.
This opens the Room Status dialog, which gives you a real-time overview of what is happening in the room.
Understanding the Room Status Dialog
The Room Status dialog shows:
- Events and tasks currently happening now
- The next scheduled event or task
- Task recurrence and check-in history (if applicable)
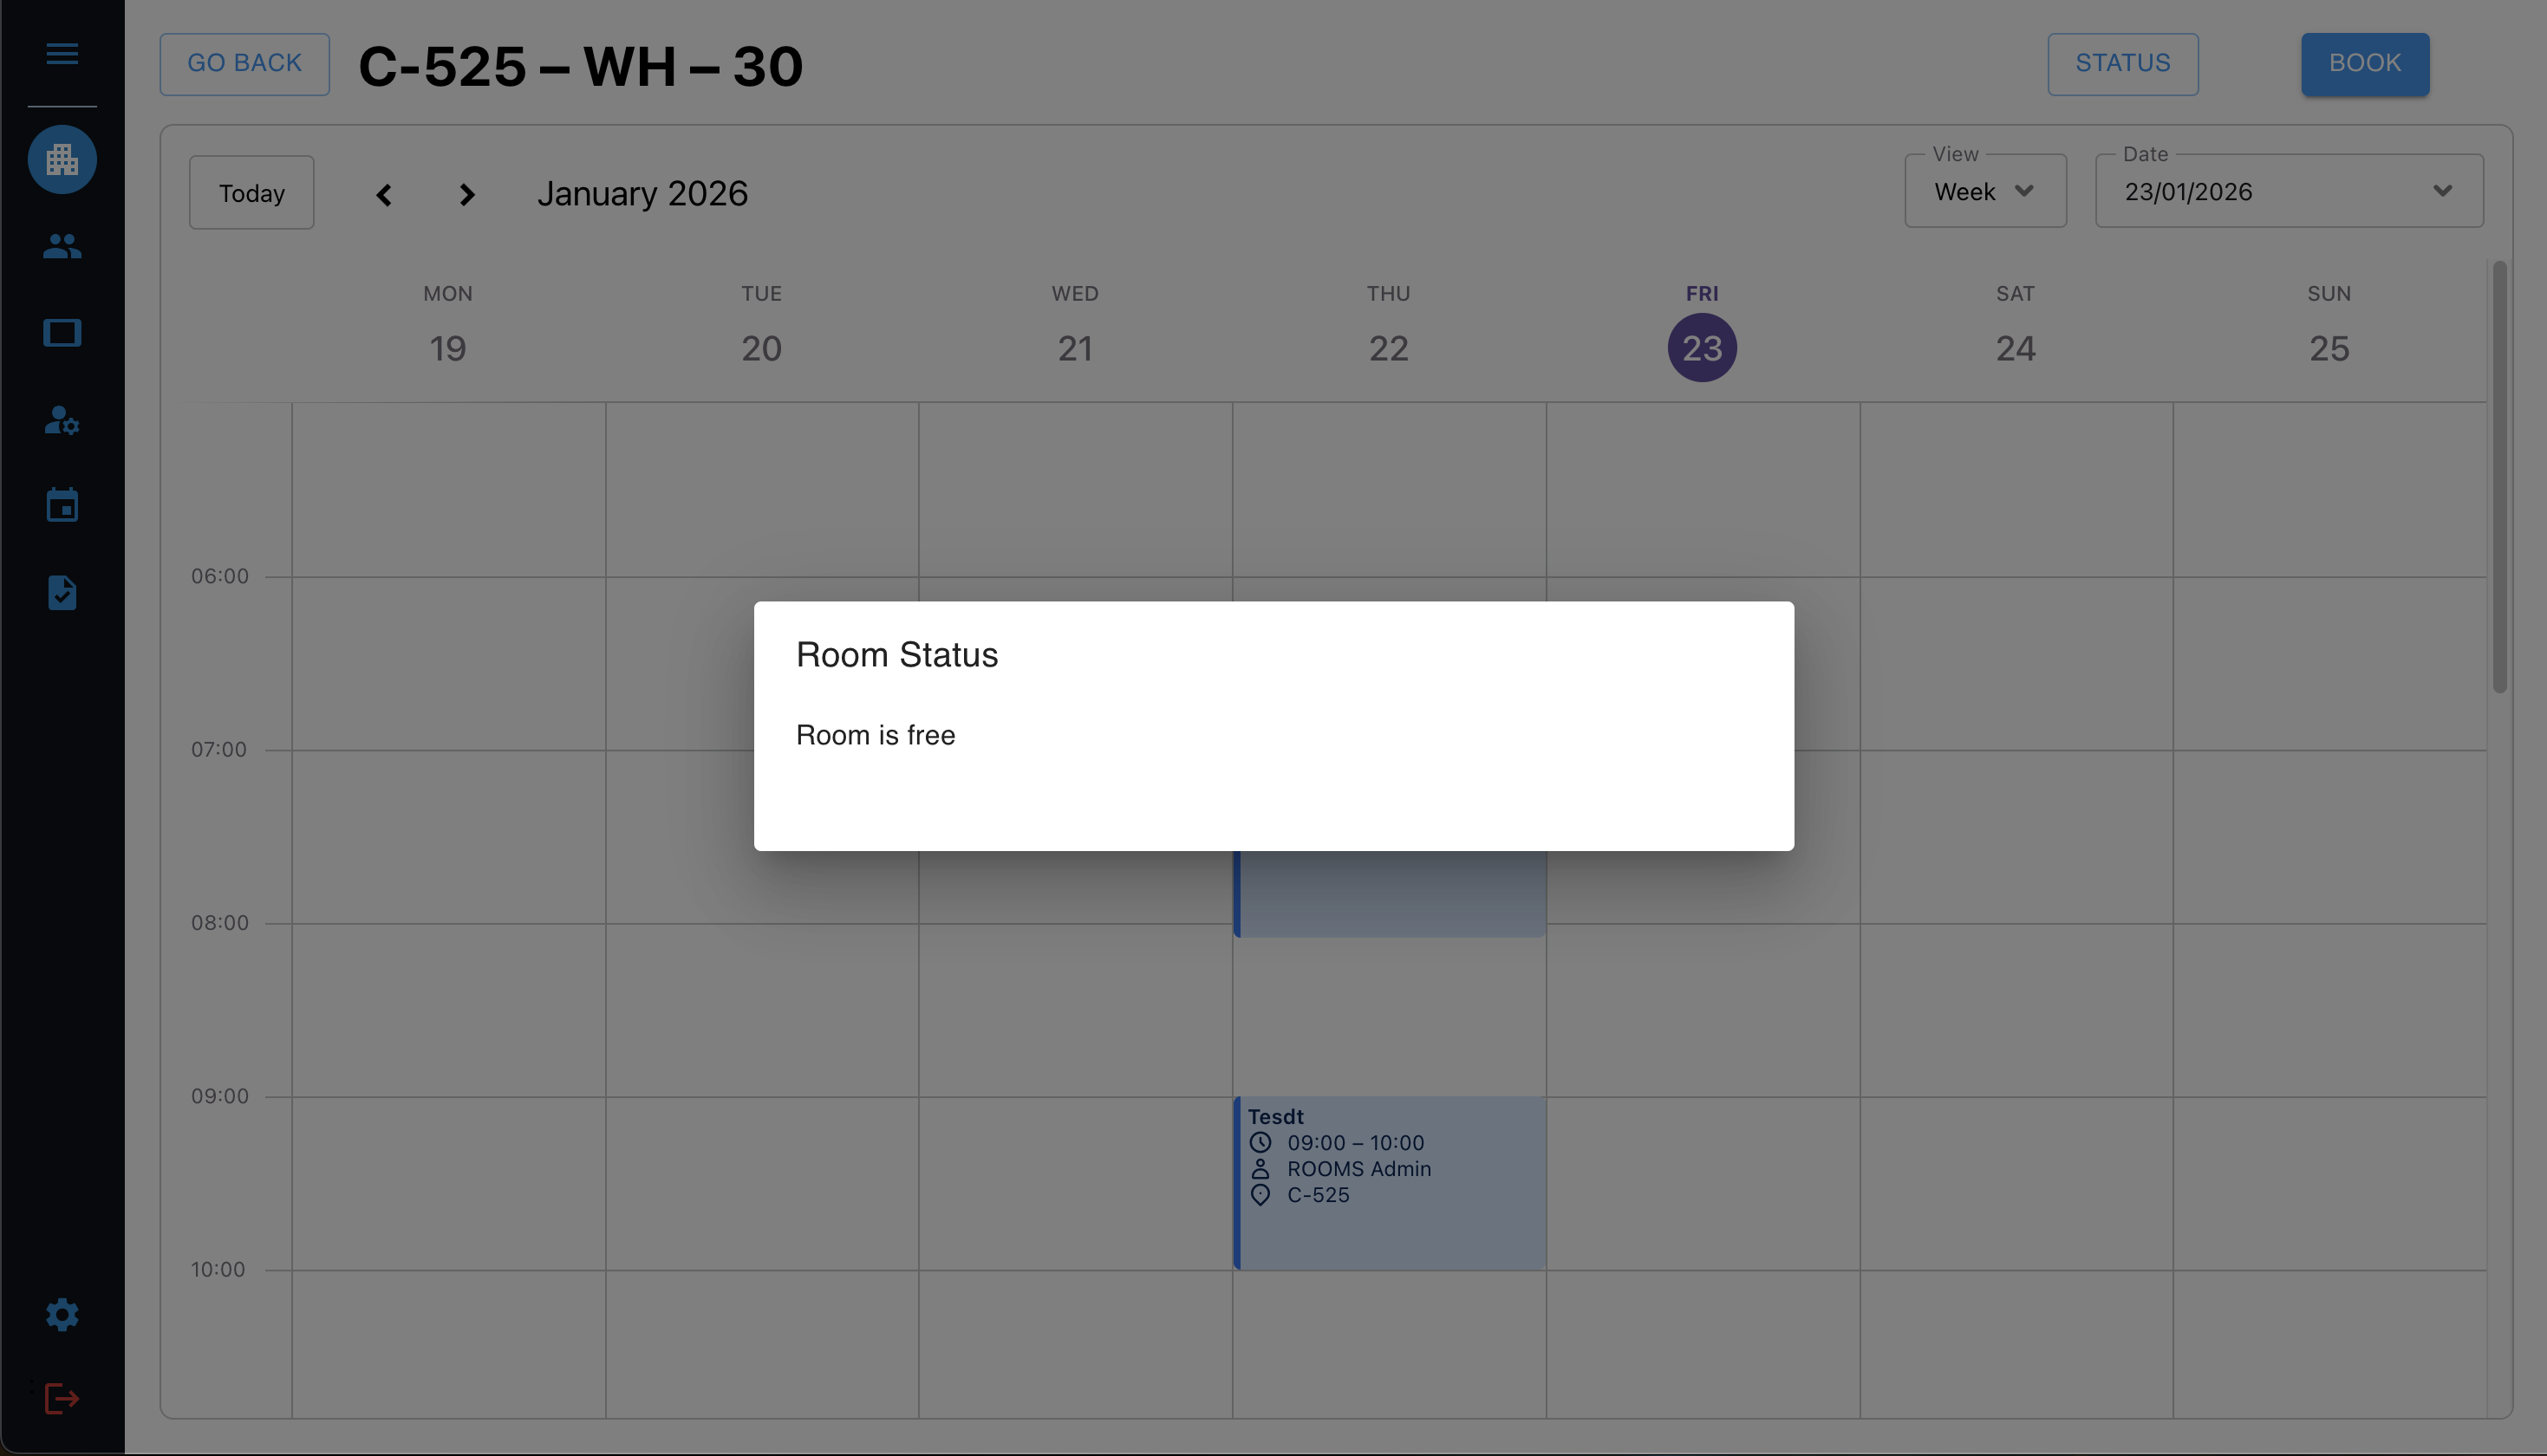
Room is Free
When no events or tasks are scheduled, the dialog indicates that the room is currently unused.
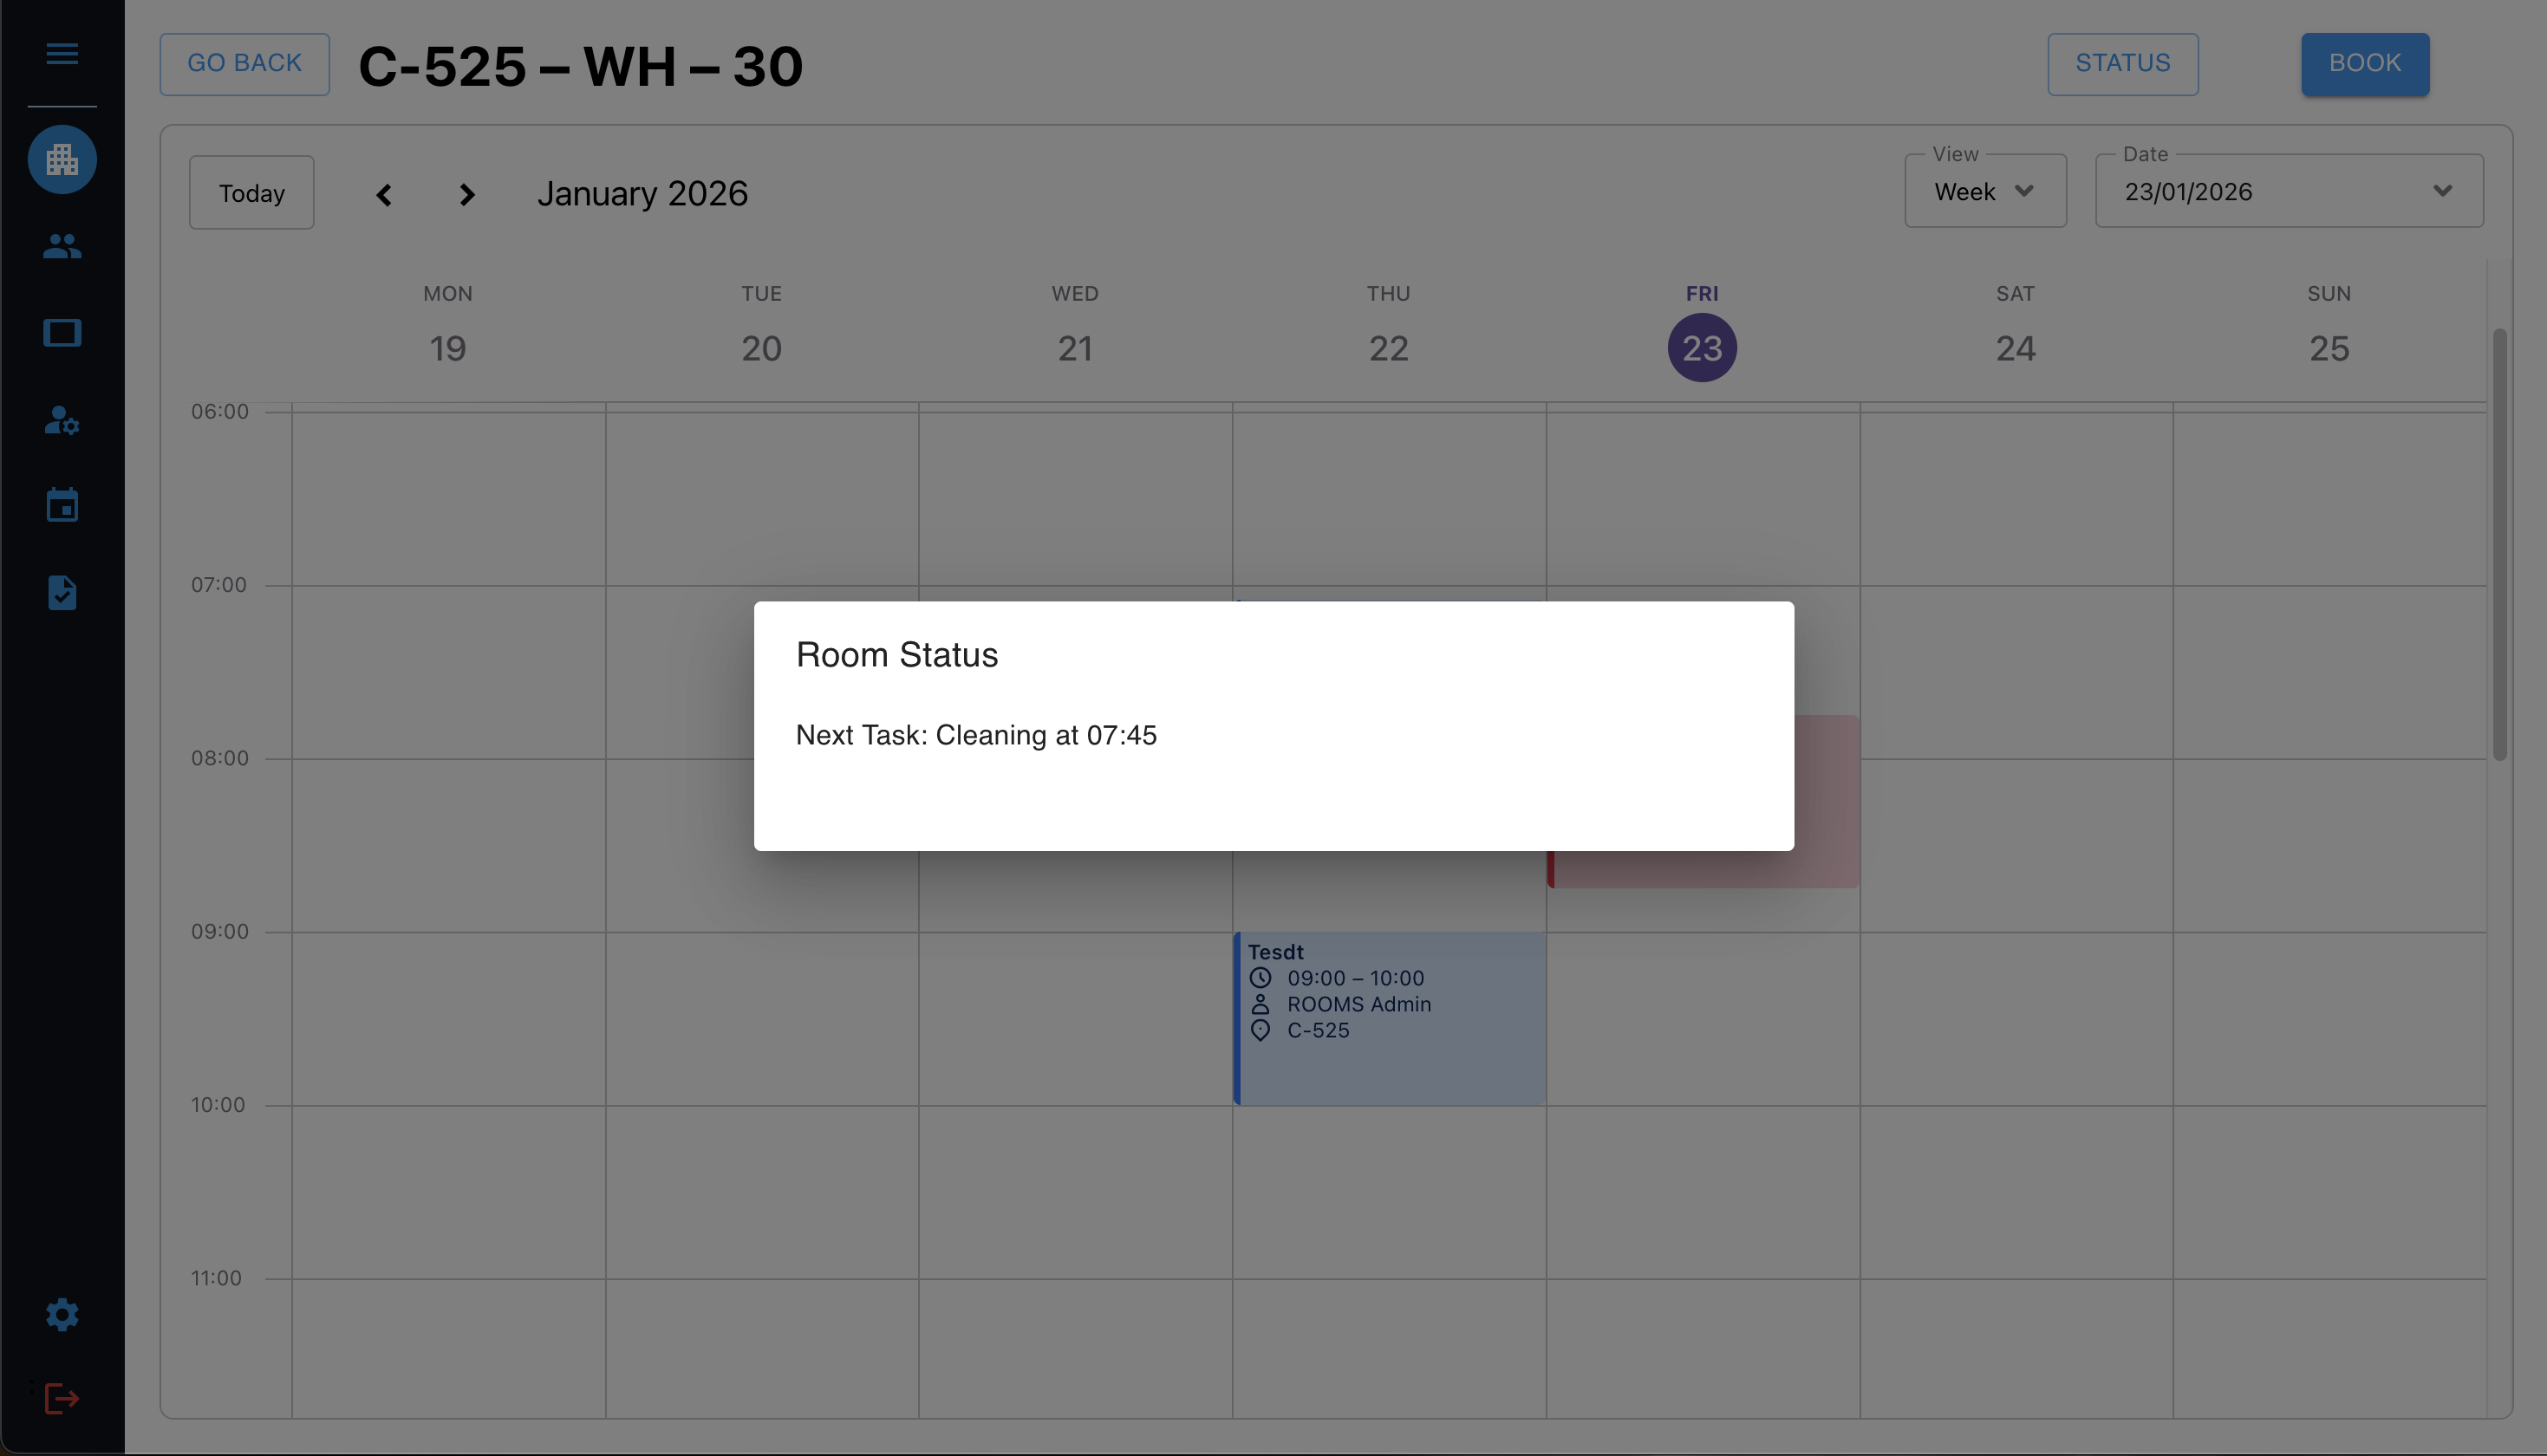
Only a Task Scheduled
If a single task is scheduled (and active), it will appear as the main item in the status panel.
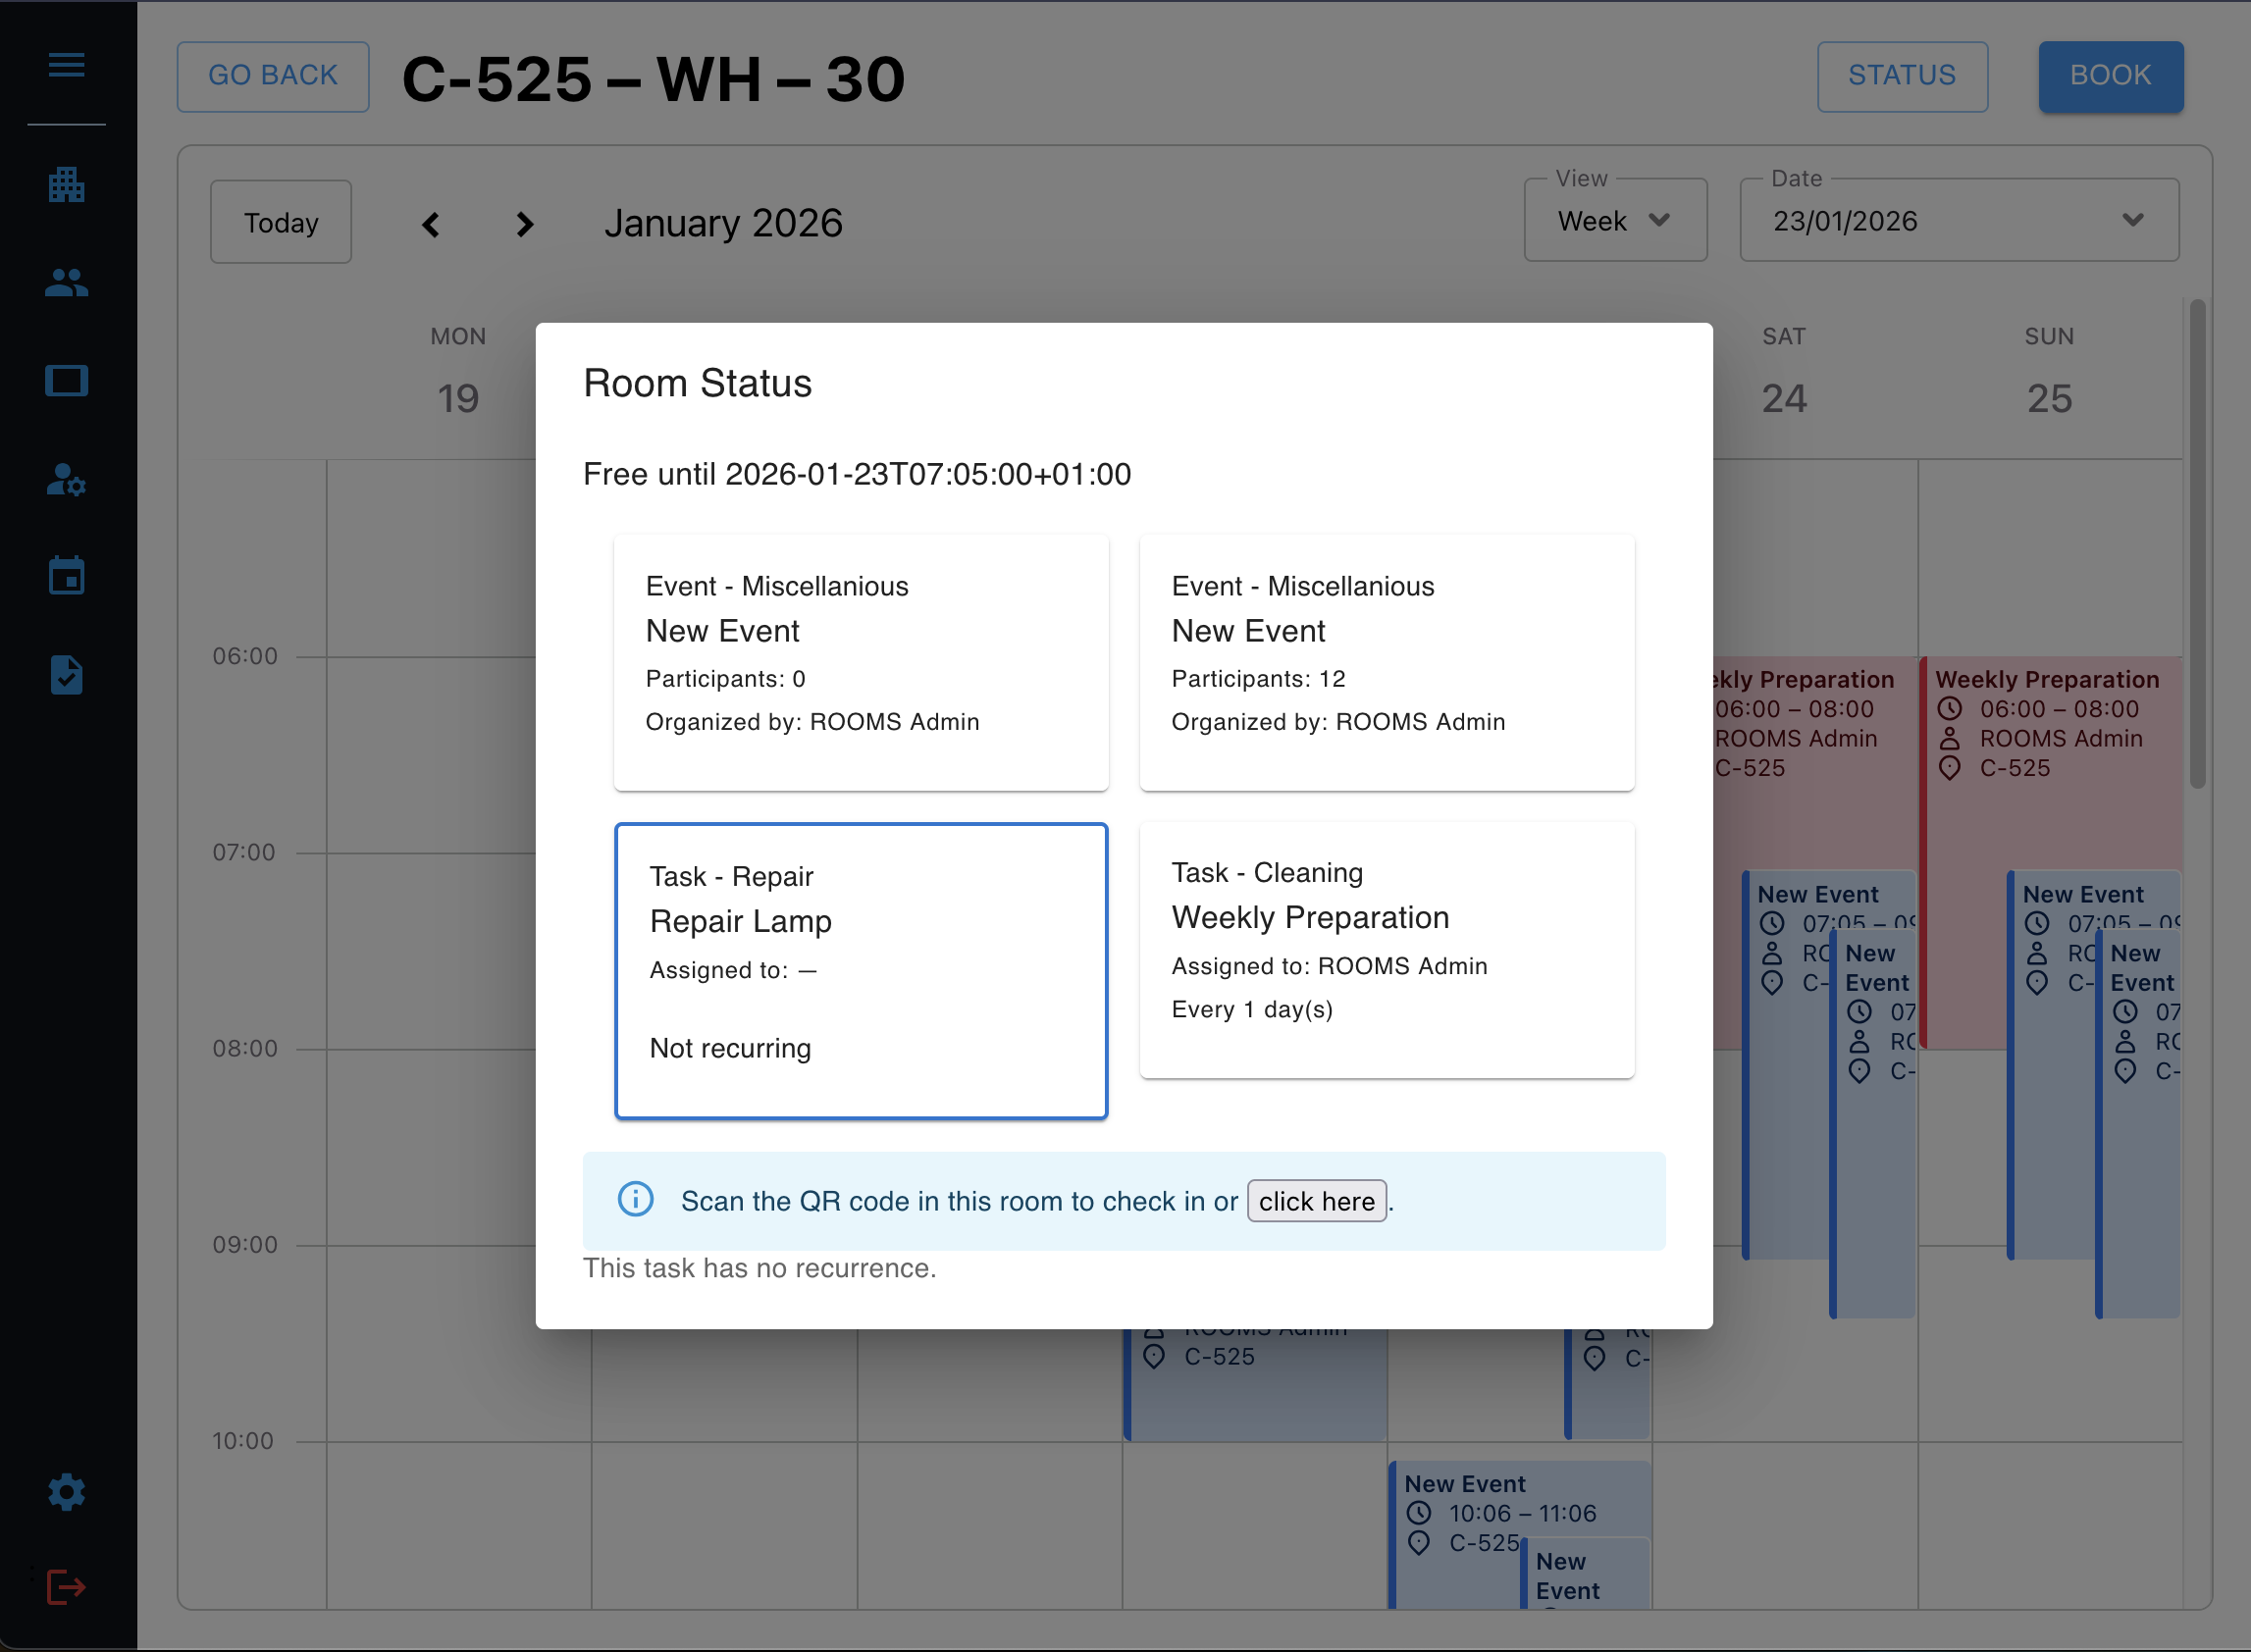
Mixed Events and Tasks
When multiple events and tasks are active:
- Events are informational only
- Tasks are selectable (click a task card to focus it)
Task Without Recurrence
If the selected task does not recur, no check-in history is shown.
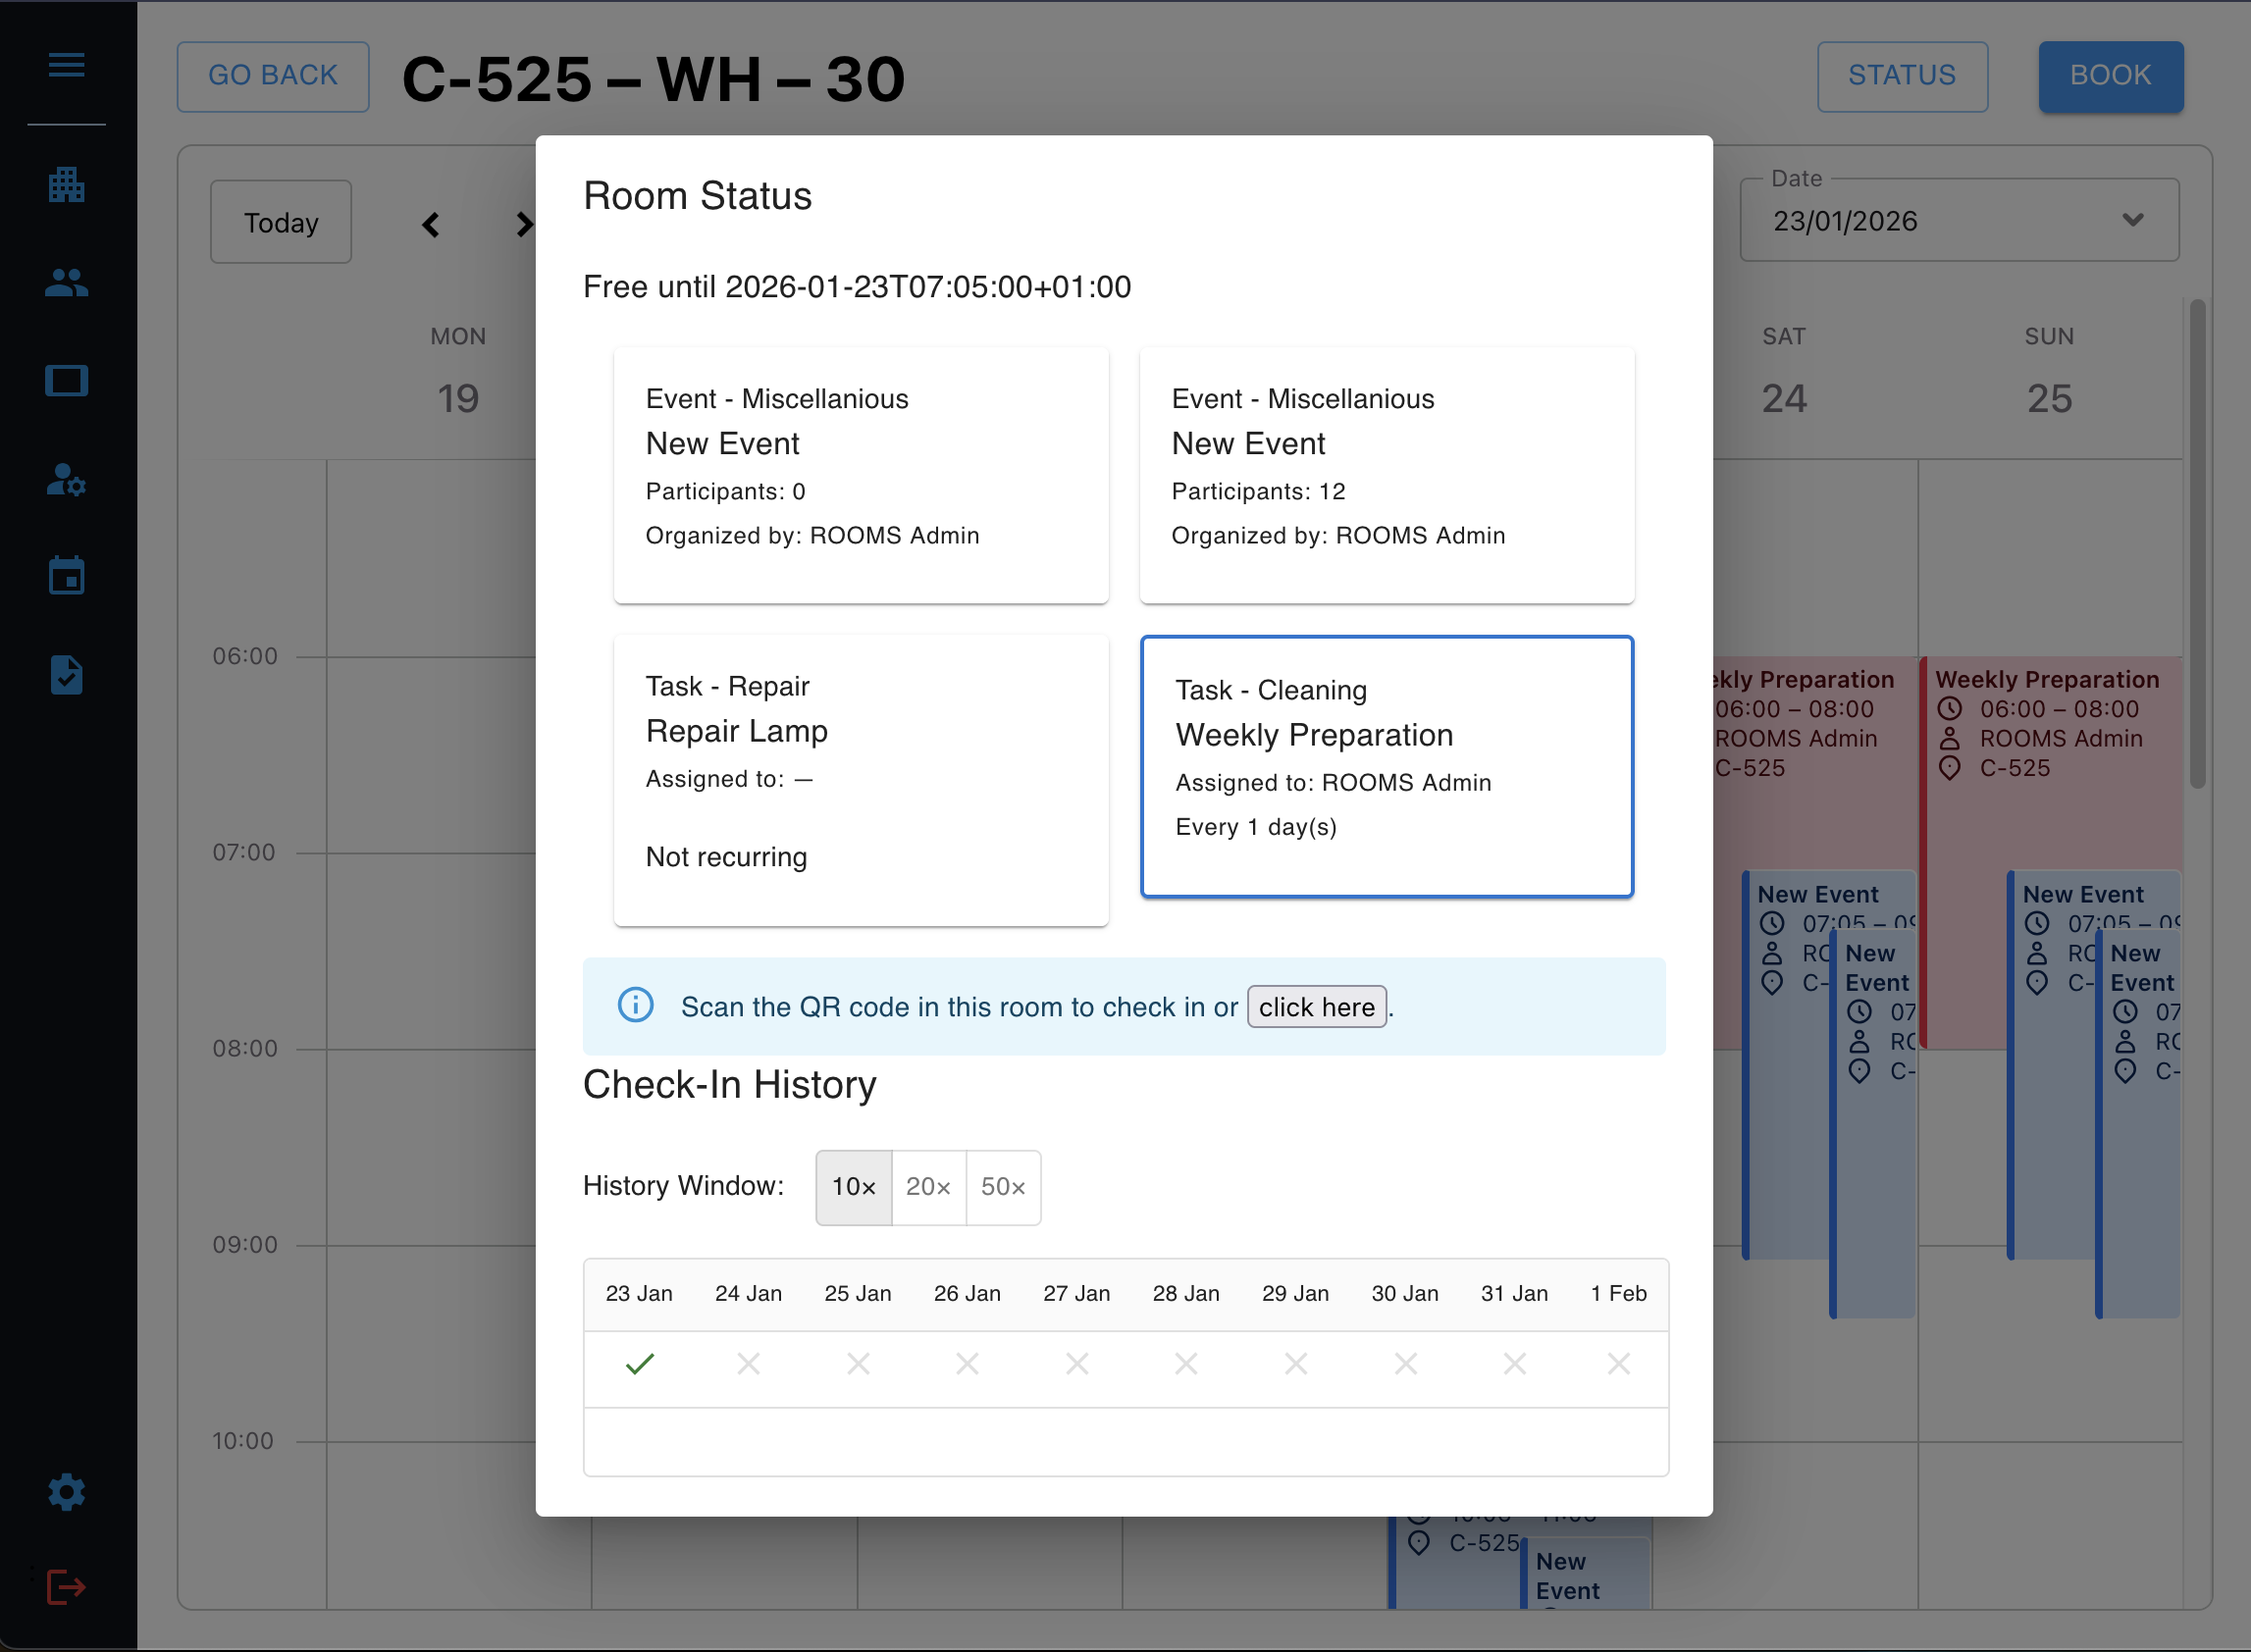
Task With Check-In History
If the task is recurring and you have permission, the dialog shows a Check-In History table indicating past completions.
How to Check In
There are two ways to initiate a check-in:
Option 1: Scan the QR Code in the Room
- Each room displays a QR code while a task is running.
- Scan the QR code using your device.
- The link is temporary and only valid for a short time.
This opens the Check-In confirmation page.
Option 2: Use the Room Status Dialog
- Open the Room Status dialog.
- Select a task assigned to you.
- Click the check-in link shown in the info message.
This will redirect you to the same confirmation page as the QR code.
Confirming the Check-In
Step 1: Confirm
On the check-in page, review the task details and click Confirm Check-In.
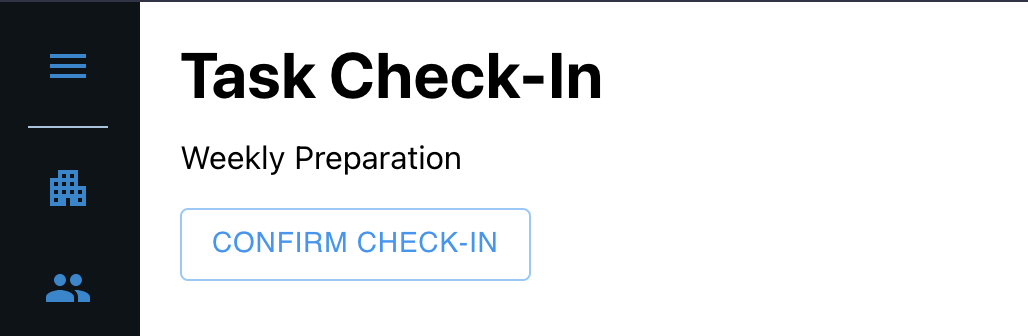
Step 2: Success
After confirmation:
- The check-in is recorded
- You’ll see a success message
- You can return to the room status view

Notes & Restrictions
- A task can only be checked in once per active instance.
- If another user has already completed the task for the current instance, you’ll be notified.
- If you are not assigned to the task, access may be denied depending on your role.
- Expired or invalid QR codes cannot be reused.
You’re all set! Use Room Status to stay informed and check in quickly when tasks are active.